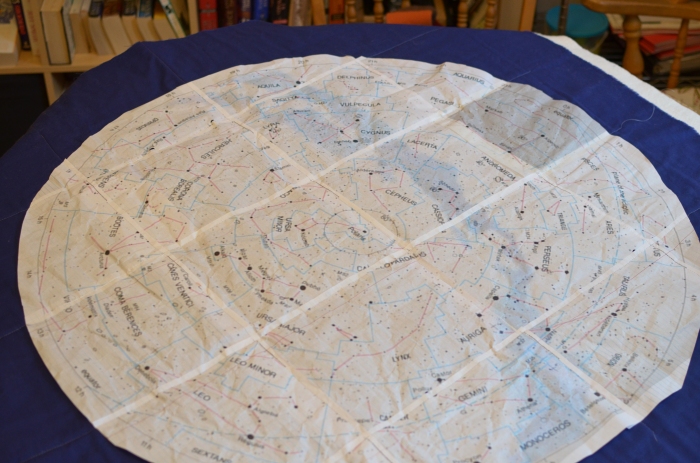
 This is a quilt in progress… actually perhaps in prep stage may be more accurate. I have absolutely no business working on this right now because there are far too many projects ahead of it, not to mention the Christmas projects I should be working on. But I couldn’t help myself, I had to at least get it ready to go.
This is inspired by a quilt at Haptic Labs. If you follow that link, you will see a New Orleans map that is calling my name. My daughter mentioned that her better half would really like the constellation quilt. Of course, I thought it needed more detail (because I’m stupid that way) which initiated a search on the internet for another image. I like that this one has the center and outer circle, the blue ‘grid’ lines (that remind me of parish/county lines), as well as the constellations themselves.
I then changed the image size to approx 30″ x 30″, saved the image to a PDF file and printed as a tiled image. The print settings would be “Poster”, “Tiled”, and check “cut marks” to allow for easy match ups. I wanted a thin paper I could quilt through and tear away once complete. I bought tracing paper (the most transparent block shown in the image), a lightweight vellum, and the inexpensive lined 3-ring binder paper (the lightweight almost newsprint version, not the crisp white version). The vellum felt too stiff in comparison, and the tracing paper had the most blurred image. The loose-leaf lined paper printed well and should tear away relatively easily so that is what I went with.
- I spray basted this quilt which was new to me. This is approximately 44″ x 44″. and spray basting worked well. I’m using Kona cotton in Nightfall top and bottom, with Quilter’s Dream cotton batting.
- Next, starting at the center, I laid out the constellation map matching the ‘cut marks’. I pinned these with straight pins as I went.
- Once all pieces were in place, I loaded water soluble thread in the top of my machine and a cotton bobbin thread in a color contrasting to the fabric. I quilted in a grid where the pages met using a long stitch length.
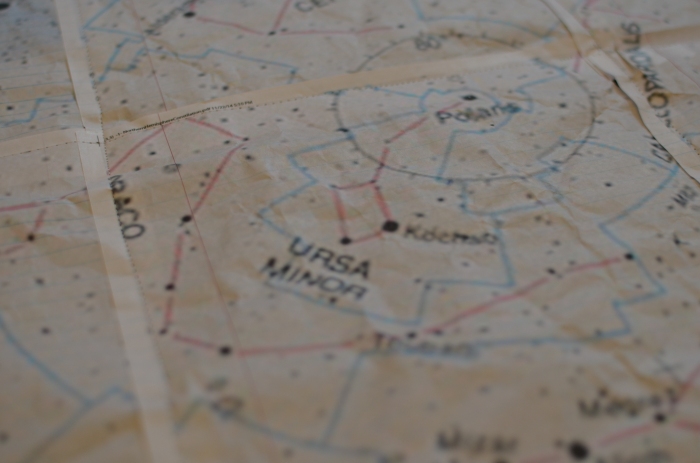
 My plan is to dissolve that top thread once all quilting is done. The bottom thread should come loose except where quilting crosses. It’s hard to tell by this photo, but those intersections aren’t as many as you would expect.
You can see a few of the paper joins here. It will be interesting to see how well this process works and I bet I will come back with a lot of ‘what not to do’ warnings! We’ll see how it goes. I keep telling myself this is an after Christmas project. (I SO want to start it now!) It is now rolled away so I can’t look at it.
A friend of mine started the world map by Haptic Labs and you can see a photo of the template laid out on her fabric here. I am really interested to see how it comes out. She is hand quilting which I think is so pretty on this type of quilt. Not to mention, she does a truly lovely job on everything she attempts.
I have another map quilt in the works as well which is inspired by Shwin and Shwin, but that will have to wait for another day.
I certainly hope you are being more productive than I am with regards to Christmas presents. There are so many on my sewing list! Do you have any good ideas? What are your favorite Christmas gifts to make?? I need to find some quick and easy, “wow, I love that!” gifts. Not asking for much, yeah?
Happy Holidays and Merry Christmas!
Ramona
This will be something special!
Christmas, Christmas presents… I am still somewhere in October…
Oh my gosh!! I’m so with you! I think we need a minimum of two months between Thanksgiving and Christmas.
Fantastic! My husband would love something like this. I don’t think it’s in my range of skills. 🙂 Good luck with it. I know it is so hard to WAIT until a project has its own time!
Im not sure its mine!! ;-)). Thanks for dtopping by.
Oh my goodness. This is the best craft project I have ever seen.
Thanks, Beth. Can’t wait to get started. 🙂
Hello,
Your technique for transferring a large pattern to fabric is intriguing. I’d like to do something similar. How did it work out?
Molly
Hey Molly,
It worked out surprisingly well! I was pleasantly surprised. I’ve been meaning to blog more about this one and have let it get away from me. I’ll try to put that back on my to-do list.
But a summary… Once I basted with water soluble thread, I machine quilted the blue grid lines shown in the photo. From there I started hand quilting the constellations. I started at the middle, tore the paper at the blue stitch line where I was working, marked my constellation on the fabric and tore away the paper at that section. Once I had hand quilted the constellation, I moved to the next one. I always worked in small sections. I actually have a photo of this quilt with the paper in tatters as I worked. :-)) I’ll have to post that one for you.
If you do something similar, you will have to let me see and let me know if you have any improvements. Have fun! Ramona
Thanks again for your feedback. On my quilt I embroidered the stars, constellation shapes, and names on the quilt top before quilting. Then I quilted the altitude and azimuth lines and some shapes around the outside. Here’s a link to a picture:
https://twooddducks.wordpress.com/
Molly
Hi! This looks amazing, I was wondering – do you have a photo of how the quilt turned out? and can you please shared the pdf of your map.
Thanks!
Sasha